Mission Architect Unique Maps: Difference between revisions
Jump to navigation
Jump to search
(Linked some existing images.) |
(Added images) |
||
| Line 13: | Line 13: | ||
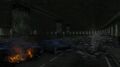
Image:ArachnosHellionsAttack01.jpg|{{center|Arachnos Storage On Fire}} | Image:ArachnosHellionsAttack01.jpg|{{center|Arachnos Storage On Fire}} | ||
Image:SubmersiblesBase1.jpg|{{center|Arachnos Submarine Base}} | Image:SubmersiblesBase1.jpg|{{center|Arachnos Submarine Base}} | ||
Image:. | Image:ArachnosTunnelsBase01.jpg|{{center|Arachnos Tunnels Base}} | ||
Image:AtlasParkArachnos01.jpg|{{center|Atlas Park (Arachnos)}} | Image:AtlasParkArachnos01.jpg|{{center|Atlas Park (Arachnos)}} | ||
Image:CaveArachnoidCocoon01.jpg|{{center|Cave - Arachnoid Cocoon}} | Image:CaveArachnoidCocoon01.jpg|{{center|Cave - Arachnoid Cocoon}} | ||
| Line 84: | Line 84: | ||
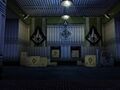
Image:PTSControlRoom1.jpg|{{center|Cap Au Diable - PTS Control Bunker}} | Image:PTSControlRoom1.jpg|{{center|Cap Au Diable - PTS Control Bunker}} | ||
Image:CAPWSPDR01.jpg|{{center|Cap Au Diable - WSPDR Building}} | Image:CAPWSPDR01.jpg|{{center|Cap Au Diable - WSPDR Building}} | ||
Image:.jpg|{{center|Dimensional Ripple: Cap Au Diable}} | Image:DimensionalRipple01.jpg|{{center|Dimensional Ripple: Cap Au Diable}} | ||
</gallery> | </gallery> | ||
{{clr}} | {{clr}} | ||
| Line 92: | Line 92: | ||
Image:ColumnEnd1.jpg|{{center|5th Column Head Quarters}} | Image:ColumnEnd1.jpg|{{center|5th Column Head Quarters}} | ||
Image:BPCave01.jpg|{{center|Banished Pantheon}} | Image:BPCave01.jpg|{{center|Banished Pantheon}} | ||
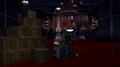
Image:.jpg|{{center|Batzul Hell}} | Image:BatzulHell01.jpg|{{center|Batzul Hell}} | ||
Image:CaveArachnoidCocoon01.jpg|{{center|Cave - Arachnoid Cocoon}} | Image:CaveArachnoidCocoon01.jpg|{{center|Cave - Arachnoid Cocoon}} | ||
Image:Calystix Map.jpg|{{center|Cave of Shaper}} | Image:Calystix Map.jpg|{{center|Cave of Shaper}} | ||
| Line 163: | Line 163: | ||
=== Cargo Ship === | === Cargo Ship === | ||
<gallery> | <gallery> | ||
Image:.jpg|{{center|Gold Bricker Portal Ship}} | Image:GBPortalShip01.jpg|{{center|Gold Bricker Portal Ship}} | ||
</gallery> | </gallery> | ||
| Line 184: | Line 184: | ||
=== Cimerora === | === Cimerora === | ||
<gallery> | <gallery> | ||
Image:.jpg|{{center|Battle Map}} | Image:CimBattleMap01.jpg|{{center|Battle Map}} | ||
Image:.jpg|{{center|Castellum Quarter}} | Image:CastellumQuarter01.jpg|{{center|Castellum Quarter}} | ||
Image:.jpg|{{center|Phoebas Point}} | Image:PhoebasPoint01.jpg|{{center|Phoebas Point}} | ||
Image:.jpg|{{center|Sibyl Temple}} | Image:SibylTemple01.jpg|{{center|Sibyl Temple}} | ||
Image:.jpg|{{center|Vespillos Pass}} | Image:VespillosPass01.jpg|{{center|Vespillos Pass}} | ||
</gallery> | </gallery> | ||
=== Circle of Thorns === | === Circle of Thorns === | ||
<gallery> | <gallery> | ||
Image:.jpg|{{center|Baron Zoria's Lair}} | Image:BaronZoriasLair01.jpg|{{center|Baron Zoria's Lair}} | ||
Image:GreatCeremony01.jpg|{{center|Circle of Thorns - Flying Ziggurat}} | Image:GreatCeremony01.jpg|{{center|Circle of Thorns - Flying Ziggurat}} | ||
Image:OrenbegaMA01.jpg|{{center|Circle of Thorns - Orenbega}} | Image:OrenbegaMA01.jpg|{{center|Circle of Thorns - Orenbega}} | ||
| Line 225: | Line 225: | ||
=== Grandville === | === Grandville === | ||
<gallery> | <gallery> | ||
Image:.jpg|{{center|Grandville - Conference Room}} | Image:GrandvilleConferenceRoom01.jpg|{{center|Grandville - Conference Room}} | ||
Image:GrandvilleTower1.jpg|{{center|Grandville - Main Lobby}} | Image:GrandvilleTower1.jpg|{{center|Grandville - Main Lobby}} | ||
Image:.jpg|{{center|Grandville - Main Square}} | Image:GrandvilleMainSquare01.jpg|{{center|Grandville - Main Square}} | ||
Image:.jpg|{{center|Grandville - The Fab}} | Image:GrandvilleFab01.jpg|{{center|Grandville - The Fab}} | ||
Image:.jpg|{{center|Grandville Beach}} | Image:GrandvilleBeach01.jpg|{{center|Grandville Beach}} | ||
</gallery> | </gallery> | ||
| Line 238: | Line 238: | ||
Image:AtlasFashionShow1.jpg|{{center|Atlas Park - Fashion Show}} | Image:AtlasFashionShow1.jpg|{{center|Atlas Park - Fashion Show}} | ||
Image:AtlasParkMA01.jpg|{{center|Atlas Park 01}} | Image:AtlasParkMA01.jpg|{{center|Atlas Park 01}} | ||
Image:. | Image:MAAtlasParkTimeCapsule01.png |{{center|Atlas Park Time Capsule}} | ||
Image:BoomtownRebuilt1.jpg|{{center|Boomtown Construction}} | Image:BoomtownRebuilt1.jpg|{{center|Boomtown Construction}} | ||
Image:CADPowerStation01.jpg|{{center|Cap Au Diable - Power Station}} | Image:CADPowerStation01.jpg|{{center|Cap Au Diable - Power Station}} | ||
| Line 252: | Line 252: | ||
Image:MACityMap02Ruin.jpg|{{center|City Map 02 (Ruined)}} | Image:MACityMap02Ruin.jpg|{{center|City Map 02 (Ruined)}} | ||
Image:MACityMap03.jpg|{{center|City Map 03}} | Image:MACityMap03.jpg|{{center|City Map 03}} | ||
Image:.jpg|{{center|Croatoa - Winter Forest & Cave}} | Image:CroatoaWinter01.jpg|{{center|Croatoa - Winter Forest & Cave}} | ||
Image:.jpg|{{center|Echo: Faultline - Resevoir}} | Image:EchoFaultlineResevoir01.jpg|{{center|Echo: Faultline - Resevoir}} | ||
Image:EdenMissionMap01.jpg|{{center|Eden - Outdoor}} | Image:EdenMissionMap01.jpg|{{center|Eden - Outdoor}} | ||
Image:Dam1.jpg|{{center|Faultline - Damn Lies}} | Image:Dam1.jpg|{{center|Faultline - Damn Lies}} | ||
Image:FaultineHR01.jpg|{{center|Faultline - High Rise}} | Image:FaultineHR01.jpg|{{center|Faultline - High Rise}} | ||
Image:.jpg|{{center|Faultline - New Overbrook}} | Image:FaultlineNewOverbrook01.jpg|{{center|Faultline - New Overbrook}} | ||
Image:MAForest01.jpg|{{center|Forest 01}} | Image:MAForest01.jpg|{{center|Forest 01}} | ||
Image:MAForest02.jpg|{{center|Forest 02}} | Image:MAForest02.jpg|{{center|Forest 02}} | ||
Image:MAForest03.jpg|{{center|Forest 03}} | Image:MAForest03.jpg|{{center|Forest 03}} | ||
Image:.jpg|{{center|Grandville - Main Square}} | Image:GrandvilleMainSquare01.jpg|{{center|Grandville - Main Square}} | ||
Image:.jpg|{{center|Grandville - The Fab}} | Image:GrandvilleFab01.jpg|{{center|Grandville - The Fab}} | ||
Image:.jpg|{{center|Grandville Beach}} | Image:GrandvilleBeach01.jpg|{{center|Grandville Beach}} | ||
Image:MAGraveyard01.jpg|{{center|Graveyard 01}} | Image:MAGraveyard01.jpg|{{center|Graveyard 01}} | ||
Image:Mausoleum01.jpg|{{center|Graveyard 02}} | Image:Mausoleum01.jpg|{{center|Graveyard 02}} | ||
Image | Image:RWZLittleRoundTop01.jpg|{{center|Little Round Top - Generic}} | ||
Image:LongbowAirBase1.jpg|{{center|Longbow Sea Base}} | Image:LongbowAirBase1.jpg|{{center|Longbow Sea Base}} | ||
Image:Clocktower01.jpg|{{center|Mercy Island - Clocktower}} | Image:Clocktower01.jpg|{{center|Mercy Island - Clocktower}} | ||
| Line 280: | Line 280: | ||
Image:SkyRaidersBase1.jpg|{{center|Sky Raider Sharkhead Base}} | Image:SkyRaidersBase1.jpg|{{center|Sky Raider Sharkhead Base}} | ||
Image:Olivia_Darque_Rescue_screenshot.jpg|{{center|Skyway City - Blockade}} | Image:Olivia_Darque_Rescue_screenshot.jpg|{{center|Skyway City - Blockade}} | ||
Image:.jpg|{{center|Skyway City Tram}} | Image:SkywayTram01.jpg|{{center|Skyway City Tram}} | ||
Image:StatueandGiza1.jpg|{{center|St. Martial - Golden Giza}} | Image:StatueandGiza1.jpg|{{center|St. Martial - Golden Giza}} | ||
Image:HardWay1.jpg|{{center|St. Martial - The Flush}} | Image:HardWay1.jpg|{{center|St. Martial - The Flush}} | ||
| Line 286: | Line 286: | ||
Image:Seraphhq01.jpg|{{center|Steel Canyon - SERAPH Lab}} | Image:Seraphhq01.jpg|{{center|Steel Canyon - SERAPH Lab}} | ||
Image:Themaw.jpg|{{center|Striga Isle - Bridge}} | Image:Themaw.jpg|{{center|Striga Isle - Bridge}} | ||
Image:.jpg|{{center|The Abyss}} | Image:TheAbyss01.jpg|{{center|The Abyss}} | ||
Image:RWZTheBulge01.jpg|{{center|The Bulge - Generic}} | Image:RWZTheBulge01.jpg|{{center|The Bulge - Generic}} | ||
Image:WarburgMaltaBAse01.jpg|{{center|Warburg Malta Base}} | Image:WarburgMaltaBAse01.jpg|{{center|Warburg Malta Base}} | ||
| Line 293: | Line 293: | ||
* ''Atlas Park (Runied)'': There is no overhead map display for this map. | * ''Atlas Park (Runied)'': There is no overhead map display for this map. | ||
* ''Atlas Park 01'': This map includes an Arachnos flyer used as the mission entrance/door. There are also cars traveling the streets and pedestrians on this map. | * ''Atlas Park 01'': This map includes an Arachnos flyer used as the mission entrance/door. There are also cars traveling the streets and pedestrians on this map. | ||
* ''Atlas Park Time Capsule'': Despite its name, this map does not appear to allow access to the Hero 1 Time Capsule room. | |||
* ''Forest (Burning)'': Removed as of 5/5/2009 patch. Future disposition unknown. | * ''Forest (Burning)'': Removed as of 5/5/2009 patch. Future disposition unknown. | ||
* ''Mercy Island - Landing Pad'': It is always night on this map, regardless of the in-game time of day. | * ''Mercy Island - Landing Pad'': It is always night on this map, regardless of the in-game time of day. | ||
| Line 309: | Line 310: | ||
=== Praetorian Outdoor Maps === | === Praetorian Outdoor Maps === | ||
<gallery> | <gallery> | ||
Image:.jpg|{{center|Neutroplis - Anti-Matter's Reactor}} | Image:AntimatterReactor.jpg|{{center|Neutroplis - Anti-Matter's Reactor}} | ||
Image:.jpg|{{center|Neutroplis - Neighborhood}} | Image:NeutropolisNeighborhood01.jpg|{{center|Neutroplis - Neighborhood}} | ||
Image:.jpg|{{center|Neutroplis - Neuron's Tower}} | Image:Neutropolis NTUTower.jpg|{{center|Neutroplis - Neuron's Tower}} | ||
Image:.jpg|{{center|Nova Praetoria - CMF}} | Image:NovaPraetoriaCMF01.jpg|{{center|Nova Praetoria - CMF}} | ||
Image:.jpg|{{center|Nova Praetoria - Magisterium}} | Image:Nova magisterium cole statue.jpg|{{center|Nova Praetoria - Magisterium}} | ||
Image:.jpg|{{center|Nova Praetoria - South Aetna}} | Image:NovaPraetoriaSouthAetna01.jpg|{{center|Nova Praetoria - South Aetna}} | ||
</gallery> | </gallery> | ||
{{clr}} | {{clr}} | ||
| Line 320: | Line 321: | ||
=== Office === | === Office === | ||
<gallery> | <gallery> | ||
Image:.jpg|{{center|Dark Astoria Office}} | Image:DAOffice01.jpg|{{center|Dark Astoria Office}} | ||
Image:FrostfireHideout1.jpg|{{center|Frostfire}} | Image:FrostfireHideout1.jpg|{{center|Frostfire}} | ||
Image:DEOffice01.jpg|{{center|Green Fog}} | Image:DEOffice01.jpg|{{center|Green Fog}} | ||
| Line 374: | Line 375: | ||
Image:RWZTheBulge01.jpg|{{center|The Bulge - Generic}} | Image:RWZTheBulge01.jpg|{{center|The Bulge - Generic}} | ||
Image:RWZTheSeer01.jpg|{{center|The Seer}} | Image:RWZTheSeer01.jpg|{{center|The Seer}} | ||
Image:.jpg|{{center|Vanguard Base - Interior}} | Image:RWZVanguardBase01.jpg|{{center|Vanguard Base - Interior}} | ||
</gallery> | </gallery> | ||
'''Notes & Comments:''' | '''Notes & Comments:''' | ||
| Line 423: | Line 424: | ||
=== Warehouse === | === Warehouse === | ||
<gallery> | <gallery> | ||
Image:.jpg|{{center|Arachnos Secret Warehouse}} | Image:ArachnosWarehouse01.jpg|{{center|Arachnos Secret Warehouse}} | ||
Image:CarnieWarehouse01.jpg|{{center|Carnival Warehouse}} | Image:CarnieWarehouse01.jpg|{{center|Carnival Warehouse}} | ||
Image:.jpg|{{center|Cesspool}} | Image:Cesspool01.jpg|{{center|Cesspool}} | ||
Image:ClockworkLair01.jpg|{{center|Clockwork King's Lair}} | Image:ClockworkLair01.jpg|{{center|Clockwork King's Lair}} | ||
Image:CouncilWarehouse01.jpg|{{center|Council}} | Image:CouncilWarehouse01.jpg|{{center|Council}} | ||
| Line 434: | Line 435: | ||
Image:LouShop1.jpg|{{center|Lou's Garage}} | Image:LouShop1.jpg|{{center|Lou's Garage}} | ||
Image:SuperadineLab1.jpg|{{center|Superadine Lab}} | Image:SuperadineLab1.jpg|{{center|Superadine Lab}} | ||
Image:.jpg|{{center|The Smelting Cauldron}} | Image:SmeltingCauldron01.jpg|{{center|The Smelting Cauldron}} | ||
Image:TsooTattoingParlor1.jpg|{{center|Tsoo Tattoo Parlor}} | Image:TsooTattoingParlor1.jpg|{{center|Tsoo Tattoo Parlor}} | ||
</gallery> | </gallery> | ||
| Line 441: | Line 442: | ||
=== Unique === | === Unique === | ||
<gallery> | <gallery> | ||
Image:.jpg|{{center|Batzul Hell}} | Image:BatzulHell01.jpg|{{center|Batzul Hell}} | ||
Image:.jpg|{{center|Dark Astoria Sewer}} | Image:DASewer01.jpg|{{center|Dark Astoria Sewer}} | ||
Image:DocVahzLair01.jpg|{{center|Dr. Vahzilok's Lair}} | Image:DocVahzLair01.jpg|{{center|Dr. Vahzilok's Lair}} | ||
Image:Dam1.jpg|{{center|Faultline}} | Image:Dam1.jpg|{{center|Faultline}} | ||
Image:MAJewelShop01.jpg|{{center|Jewelry Shop 01}} | Image:MAJewelShop01.jpg|{{center|Jewelry Shop 01}} | ||
Image:MAJewelShop02.jpg|{{center|Jewelry Shop 02}} | Image:MAJewelShop02.jpg|{{center|Jewelry Shop 02}} | ||
Image:.jpg|{{center|Manticore's Mansion}} | Image:ManticoreMansion01.jpg|{{center|Manticore's Mansion}} | ||
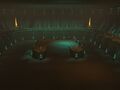
Image:MAMidnighterClub01.jpg|{{center|Midnighter Club}} | Image:MAMidnighterClub01.jpg|{{center|Midnighter Club}} | ||
Image:MAPawnShop01.jpg|{{center|Pawn Shop 01}} | Image:MAPawnShop01.jpg|{{center|Pawn Shop 01}} | ||
| Line 454: | Line 455: | ||
Image:PoliceStation02.jpg|{{center|Police Station 02}} | Image:PoliceStation02.jpg|{{center|Police Station 02}} | ||
Image:PresidentialRoom1.jpg|{{center|President Marchand's Office}} | Image:PresidentialRoom1.jpg|{{center|President Marchand's Office}} | ||
Image:.jpg|{{center|Road Tunnel}} | Image:RoadTunnel01.jpg|{{center|Road Tunnel}} | ||
Image:RuladakCave01.jpg|{{center|Ruladak Cave}} | Image:RuladakCave01.jpg|{{center|Ruladak Cave}} | ||
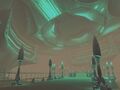
Image:.jpg|{{center|Shiva Fragment}} | Image:ShivaFragment01.jpg|{{center|Shiva Fragment}} | ||
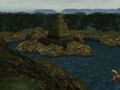
Image:.jpg|{{center|Space Island}} | Image:SpaceIsland01.jpg|{{center|Space Island}} | ||
Image:HardWay1.jpg|{{center|St. Martial - The Flush}} | Image:HardWay1.jpg|{{center|St. Martial - The Flush}} | ||
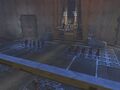
Image:CenterDangerRoom01.jpg|{{center|The Centers Danger Room}} | Image:CenterDangerRoom01.jpg|{{center|The Centers Danger Room}} | ||
Latest revision as of 06:01, 4 February 2024
Overview
This page provides a visual list, by means of in-game screenshots, of all Mission Architect map categories belonging to the Unique Maps Map Type.
Unique Maps Categories
Arachnos
 Arachnos Arachnoid Lab
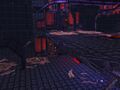 Arachnos Base (Snake Infested)
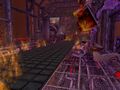 Arachnos Base On Fire
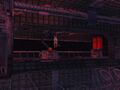
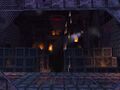 Arachnos Storage On Fire
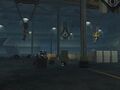
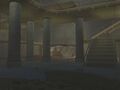
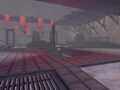 Arachnos Submarine Base
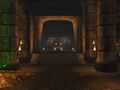
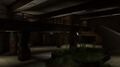
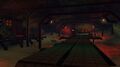 Arachnos Tunnels Base
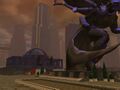 Atlas Park (Arachnos)
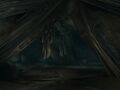 Cave - Arachnoid Cocoon
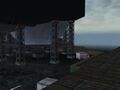 Mercy Island - Factory
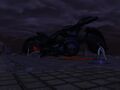 Mercy Island - Landing Pad
 Mercy Island - Widow Tower
- Widow Tower


Notes & Comments:
- Mercy Island - Landing Pad: It is always night on this map, regardless of the in-game time of day.
- Mercy Island - Widow Tower: Currently, this is the same map as Widow Tower
- Widow Tower: Currently, this is the same map as Mercy Island - Widow Tower
Unlockables:
- Cave - Arachnoid Cocoon: Additional Cave Maps
Atlas Park
 Atlas Park (Ruined)
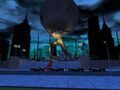 Atlas Park - Fashion Show
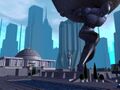 Atlas Park 01
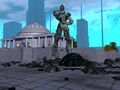 Atlas Park 02


Notes & Comments:
- Atlas Park (Ruined): There is no overhead map display for this map.
- Atlas Park 01: This map includes an Arachnos flyer used as the mission entrance/door. There are also cars traveling the streets and pedestrians on this map.
- Atlas Park 02: This map includes a destroyable meteor in a crater. There is no way to make the meteor a mission goal. The door is an Ouroboros crystal.
Banks
 22nd National Bank 01
- 22nd National Bank 02
- 22nd National Bank 03
- 22nd National Bank 04
- 22nd National Bank 05
- 22nd National Bank 06
- 22nd National Bank 07
- 22nd National Bank 08
 Bank Exchange 01
 Bank Exchange 02
 Bank Exchange 03
 First National Bank 01
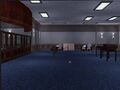 First National Bank 02
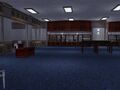 First National Bank 03
 Long Shot Savings & Loan 01
- Long Shot Savings & Loan 02
- Long Shot Savings & Loan 03
- Long Shot Savings & Loan 04
- Long Shot Savings & Loan 05
- Long Shot Savings & Loan 06
- Long Shot Savings & Loan 07
- Long Shot Savings & Loan 08


Notes & Comments:
- 22nd National Bank (all): Apart from the placement of doors and hallways, the visual elements of the 22nd National Bank maps do not change significantly from one map to the next.
- Long Shot Savings & Loan (all): Apart from the placement of doors and hallways, the visual elements of the Long Shot Savings & Loan maps do not change significantly from one map to the next.
Unlockables:
- 22nd National Bank (02 - 08): Additional Bank Maps
- Bank Exchange (02 - 03): Additional Bank Maps
- First National Bank (02 - 03): Additional Bank Maps
- Long Shot Savings & Loan (02 - 08): Additional Bank Maps
Cap Au Diable
 Cap Au Diable - Power Station
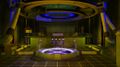
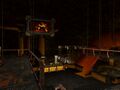 Cap Au Diable - PTS Control Bunker
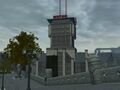 Cap Au Diable - WSPDR Building
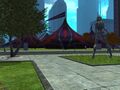
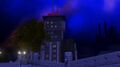 Dimensional Ripple: Cap Au Diable


Caves (Unique)
 5th Column Head Quarters
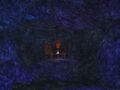 Banished Pantheon
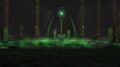
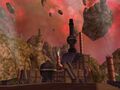
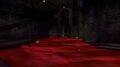
 Batzul Hell
- Cave - Arachnoid Cocoon
 Cave of Shaper
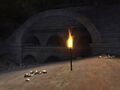 Cimeroran Tombs
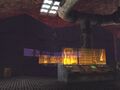 Council - Giant Robot 01
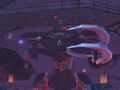 Council - Giant Robot 03
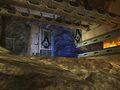 Council - Radar Room 01
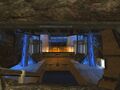 Council - Radar Room 02
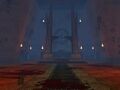 Infernal's Lair
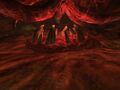 Johnny's Hell
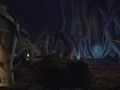 Nerva Isle Respec
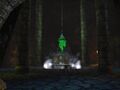 Orenbega
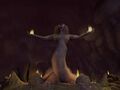 Snake Cave (with Idol)
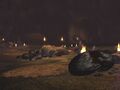 Snake Cave - Hatchery
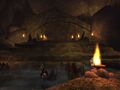 Snake Cave - Sthenos' Lair
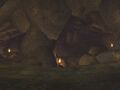 Snake Cave 01
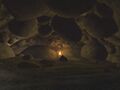 Snake Cave 02
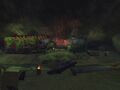 Trolls
 Tyrant's Lair
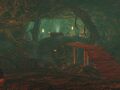 Witch's Lair


Notes & Comments:
- Council - Radar Room 01: This is a very small map consisting of a single room typical of the standard Council map set.
- Council - Radar Room 02: This is a very small map consisting of a single room typical of the standard Council map set.
Unlockables:
- 5th Column Head Quarters: Additional Cave Maps
- Banished Pantheon: Additional Cave Maps
- Cave - Arachnoid Cocoon: Additional Cave Maps
- Cave of Shaper: Additional Cave Maps
- Cimeroran Tombs: Additional Cave Maps
- Council - Giant Robot 01: Additional Cave Maps
- Council - Giant Robot 03: Unique Council Maps
- Council - Radar Room 01: Additional Cave Maps
- Council - Radar Room 02: Unique Council Maps
- Infernal's Lair: Additional Cave Maps
- Nerva Isle Respec: Additional Cave Maps
- Orenbega: Additional Cave Maps
- Snake Cave (with Idol): Additional Cave Maps
- Snake Cave - Hatchery: Additional Cave Maps
- Snake Cave - Sthenos' Lair: Additional Cave Maps
- Snake Cave 01: Additional Cave Maps
- Snake Cave 02: Additional Cave Maps
- Trolls: Additional Cave Maps
- Witch's Lair: Additional Cave Maps
Council & 5th Column
- 5th Column Head Quarters
 Council
- Council - Giant Robot 01
- Council - Giant Robot 03
- Council - Radar Room 01
- Council - Radar Room 02
 Council Factory 01
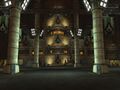 The Centers Danger Room


Notes & Comments:
- Council - Radar Room 01: This is a very small map consisting of a single room typical of the standard Council map set.
- Council - Radar Room 02: This is a very small map consisting of a single room typical of the standard Council map set.
Unlockables:
- Council - Giant Robot 01: Additional Cave Maps
- Council - Giant Robot 03: Unique Council Maps
- Council - Radar Room 01: Additional Cave Maps
- Council - Radar Room 02: Unique Council Maps
Cargo Ship
 Gold Bricker Portal Ship

Casino
 Blackbeards
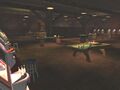 Chum Bucket
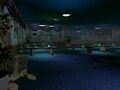 Hook & Anchor
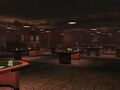
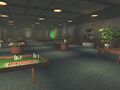 Longbow Officer's Club
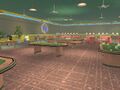 Lucky Six
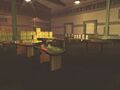 Speakeasy
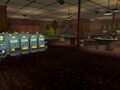 Tiki
Tiki


Unlockables:
- Longbow Officer's Club: Pawn Shops, Casinos and Police Stations
- Speakeasy: Pawn Shops, Casinos and Police Stations
- Tiki: Pawn Shops, Casinos and Police Stations
Cimerora
 Battle Map
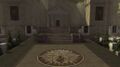 Castellum Quarter
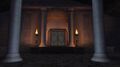 Phoebas Point
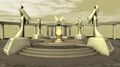 Sibyl Temple
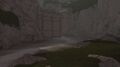 Vespillos Pass


Circle of Thorns
 Baron Zoria's Lair
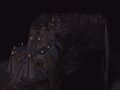 Circle of Thorns - Flying Ziggurat
- Circle of Thorns - Orenbega
 Circle of Thorns - Spirit City
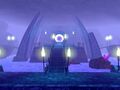 Circle of Thorns - Vaults of Mu
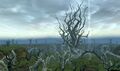 Thorn Tree 02


Unlockables:
- Circle of Thorns - Orenbega: Additional Cave Maps
- Circle of Thorns - Vaults of Mu: Unique Circle of Thorns Maps
- Thorn Tree 02: Unique Circle of Thorns Maps
Croatoa
 Croatoa 01
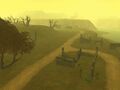 Croatoa 02
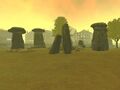 Croatoa 03
 Croatoa 04
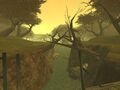 Croatoa 05
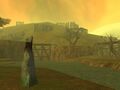 Croatoa 06
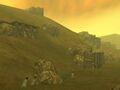 Croatoa 07
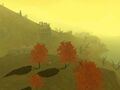 Croatoa 08
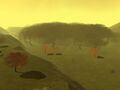 Croatoa 09


Unlockables:
- Croatoa (05 - 09): Special Outdoor Croatoa Maps
Grandville
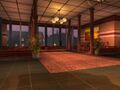
 Grandville - Conference Room
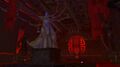 Grandville - Main Lobby
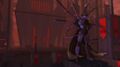 Grandville - Main Square
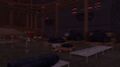 Grandville - The Fab
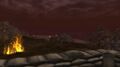 Grandville Beach


Outdoor Maps
- Atlas Park (Arachnos)
- Atlas Park (Ruined)
- Atlas Park - Fashion Show
- Atlas Park 01
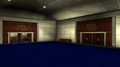 Atlas Park Time Capsule
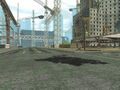 Boomtown Construction
- Cap Au Diable - Power Station
- Cap Au Diable - WSPDR Building
 Carnival of Shadows - Commercial
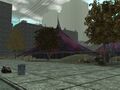 Carnival of Shadows - Residential
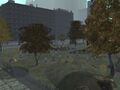 City Map 01
 City Map 01 (Council)
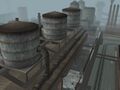 City Map 01 (Industrial)
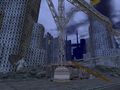 City Map 01 (Ruined)
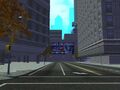 City Map 02
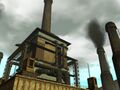 City Map 02 (Industrial)
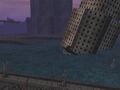 City Map 02 (Ruined)
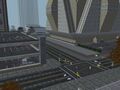 City Map 03
 Croatoa - Winter Forest & Cave
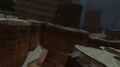 Echo: Faultline - Resevoir
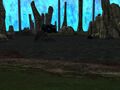 Eden - Outdoor
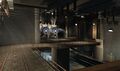 Faultline - Damn Lies
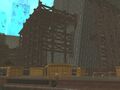 Faultline - High Rise
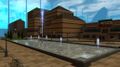 Faultline - New Overbrook
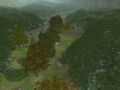 Forest 01
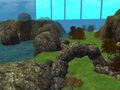 Forest 02
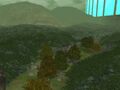 Forest 03
- Grandville - Main Square
- Grandville - The Fab
- Grandville Beach
 Graveyard 01
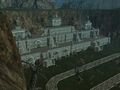 Graveyard 02
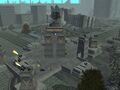 Little Round Top - Generic
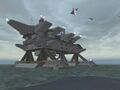
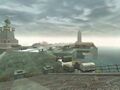 Longbow Sea Base
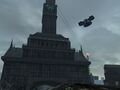 Mercy Island - Clocktower
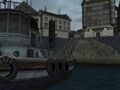 Mercy Island - Dock & Alley
- Mercy Island - Landing Pad
 Nemesis Shadow Shard Base
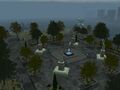 Nerva - Fountain Island
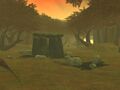
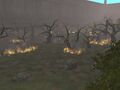 Outdoor - Burning Forest
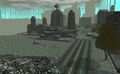 Point du Hoc - Generic
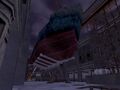 Port Oakes - Cargo Ship Yard
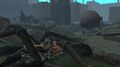 Siren's Call
- Siren's Call - Villain Base
 Sky Raider Sharkhead Base
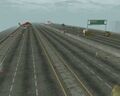 Skyway City - Blockade
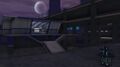 Skyway City Tram
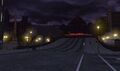 St. Martial - Golden Giza
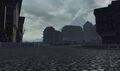 St. Martial - The Flush
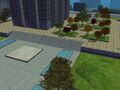 Steel Canyon
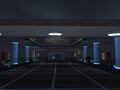 Steel Canyon - SERAPH Lab
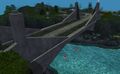 Striga Isle - Bridge
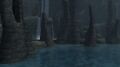 The Abyss
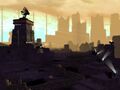 The Bulge - Generic
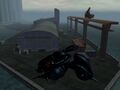 Warburg Malta Base


Notes & Comments:
- Atlas Park (Runied): There is no overhead map display for this map.
- Atlas Park 01: This map includes an Arachnos flyer used as the mission entrance/door. There are also cars traveling the streets and pedestrians on this map.
- Atlas Park Time Capsule: Despite its name, this map does not appear to allow access to the Hero 1 Time Capsule room.
- Forest (Burning): Removed as of 5/5/2009 patch. Future disposition unknown.
- Mercy Island - Landing Pad: It is always night on this map, regardless of the in-game time of day.
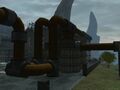
- Warburg Malta Base: This is an indoor/outdoor combination map.
Unlockables:
- City Map 02: Special Outdoor Maps
- City Map 02 (Industrial): Special Outdoor Maps
- City Map 02 (Ruined): Special Outdoor Maps
- City Map 03: Special Outdoor Maps
- Forest 02:Special Outdoor Maps
- Forest 03: Special Outdoor Maps
- Graveyard 02: Special Outdoor Maps
Praetorian Outdoor Maps
 Neutroplis - Anti-Matter's Reactor
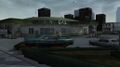 Neutroplis - Neighborhood
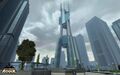 Neutroplis - Neuron's Tower
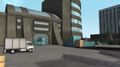 Nova Praetoria - CMF
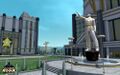 Nova Praetoria - Magisterium
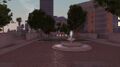 Nova Praetoria - South Aetna


Office
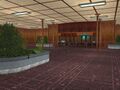
 Dark Astoria Office
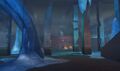 Frostfire
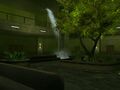 Green Fog
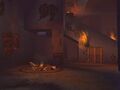 Hellions
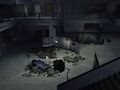 Mayhem's Hospital
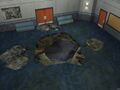 Office to Rikti Caves 01
- Office to Rikti Caves 02
- Office to Rikti Caves 03
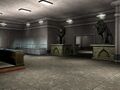
 President Marchand's Office
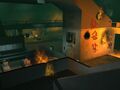 Skulls


Notes & Comments:
- Office to Rikti Caves (all): Apart from the general layout, the visual elements of the Office to Rikti Caves maps are largely similar, and the transitional area appears identical for all three.
Unlockables:
- Office to Rikti Caves (02 - 03): Additional Special Cave Maps
Mercy Island
- Mercy Island - Clocktower
- Mercy Island - Dock & Alley
- Mercy Island - Factory
- Mercy Island - Landing Pad
- Mercy Island - Widow Tower
Notes & Comments:
- Mercy Island - Landing Pad: It is always night on this map, regardless of the in-game time of day.
Nerva Archipelago
- Nerva - Fountain Island
 Nerva Primeva
- Thorn Tree 02

Unlockables:
- Thorn Tree 02: Unique Circle of Thorns Maps
Rikti War Zone
- Little Round Top
- Little Round Top - Generic
- Office to Rikti Caves 01
- Office to Rikti Caves 02
- Office to Rikti Caves 03
- Point du Hoc
- Point du Hoc - Generic
 Portal Cavern
- The Bulge
- The Bulge - Generic
 The Seer
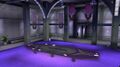 Vanguard Base - Interior


Notes & Comments:
- Office to Rikti Caves (all): Apart from the general layout, the visual elements of the Office to Rikti Caves maps are largely similar, and the transitional area appears identical for all three.
- - Generic (all): Maps with this suffix have no cosmetic difference from the original maps, but can have a Giant Monster objective.
Unlockables:
- Office to Rikti Caves (02 - 03): Additional Special Cave Maps
Snake Maps
- Arachnos Base - Snake Infested
- Snake Cave (with Idol)
- Snake Cave - Hatchery
- Snake Cave - Sthenos' Lair
- Snake Cave 01
- Snake Cave 02
Unlockables:
- Snake Cave (with Idol): Additional Cave Maps
- Snake Cave - Hatchery: Additional Cave Maps
- Snake Cave - Sthenos' Lair: Additional Cave Maps
- Snake Cave 01: Additional Cave Maps
- Snake Cave 02: Additional Cave Maps
Tech Lab
 Abandoned Tech 01 (Small)
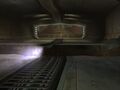 Abandoned Tech 02 (Small)
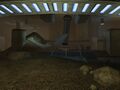 Abandoned Tech 03 (Small)
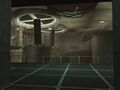 Abandoned Tech 04 (Small)
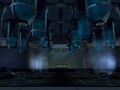 Crey Hero Lab
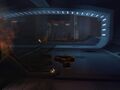 Demon-Infested Tech
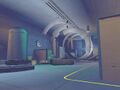 Portal Corp 01
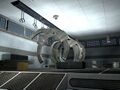 Portal Corp 02
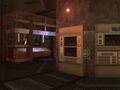 Villain Tutorial Bunker


Notes & Comments:
- Crey Hero Lab: Removed as of 5/5/2009 patch. Future disposition unknown.
Unlockables:
- Abandoned Tech (02 - 04): Additional Tech Maps
- Portal Corp 02: Additional Tech Maps
Warehouse
 Arachnos Secret Warehouse
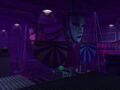 Carnival Warehouse
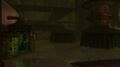 Cesspool
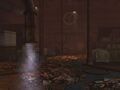 Clockwork King's Lair
- Council
- Council Factory 01
 Dance Rave
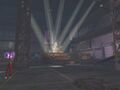 Freak-lympics
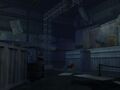 Freakshow
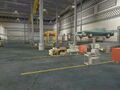 Lou's Garage
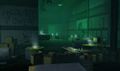 Superadine Lab
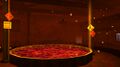 The Smelting Cauldron
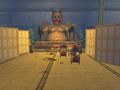 Tsoo Tattoo Parlor


Unique
- Batzul Hell
 Dark Astoria Sewer
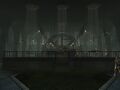 Dr. Vahzilok's Lair
- Faultline
 Jewelry Shop 01
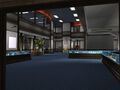 Jewelry Shop 02
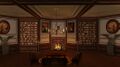 Manticore's Mansion
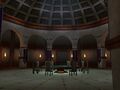 Midnighter Club
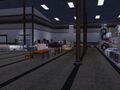 Pawn Shop 01
 Pawn Shop 02
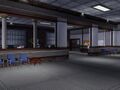 Police Station 01
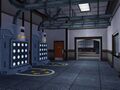 Police Station 02
- President Marchand's Office
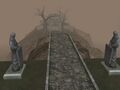
 Road Tunnel
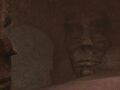 Ruladak Cave
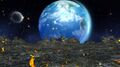 Shiva Fragment
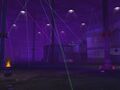
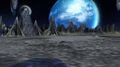 Space Island
- St. Martial - The Flush
- The Centers Danger Room
 The Zig Breakout
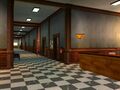 University Basement
- Villain Tutorial Bunker
- Widow Tower


Notes & Comments:
- The Zig Breakout: It is always night on this map, regardless of the in-game time of day. The map contains an indoor and an outdoor portion; the indoor portion is accessed through the sewer entrance on the northwest side of the map.
Unlockables:
- Jewelry Shop 02: Pawn Shops, Casinos and Police Stations
- Pawn Shop 02: Pawn Shops, Casinos and Police Stations
- Police Station 02: Pawn Shops, Casinos and Police Stations